Finishing Ideas for Handcrafts
Ornament Finishing 2
1 Comment
I want to share some ornament finishing ideas with you – so here is another one.
Here’s a simple fabric finish that I used for an ornament exchange last year:
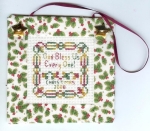
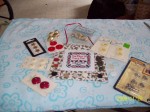
 Bless Us Ornament (Lots and lots of pics!) (This was stitched with WDW Christmas)
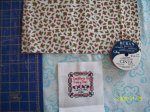
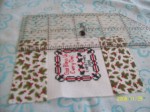
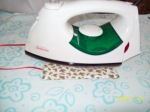
1. Gather your materials: Stitched piece, fabric, ribbon, thread, fusible padding, stitch witchery(the kind intended for hems), buttons or other embellishments.
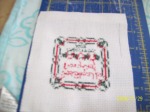
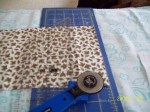
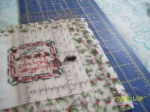
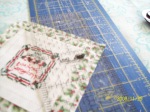
2. Measure out from the stitching (1-2” to 3-4”)

3. Cut two strips of fabric the width of your stitched piece by about 3 inches.
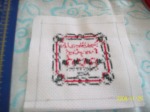
4. Pin the strips, right sides facing, to the top and bottom.
5. Sew along your marked lines.
6. Open, and
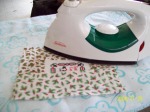
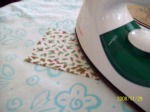
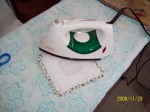
7. Press
8. Measure the total length and 
9. Cut two more strips of fabric the length by about three inches.
10. Pin right sides facing and
11. Sew, then
12. Press open
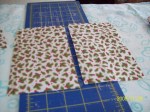
13. Cut a piece of fabric the height of your front and two inches wider than the width,
14. Cut this piece in half down the middle.
15. Turn under 1-2 inch and press on one side 
16. Don’t forget to pin a length of ribbon to the top right side of your ornament (we won’t mention that I frequently forget this important step – lol!)
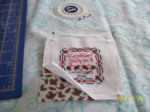
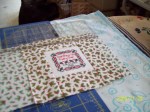
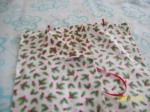
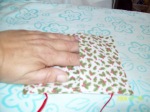
17. Lay the two pieces of backing, right side up, and with the folded edge on top towards the center (I have the corner turned back just to show you the folded edge).
18. Place the ornament front, right side down over the backing pieces and pin. I bring the ribbon hanger out through the opening in the back so I won’t accidentally sew it in the sides.
19. Sew around all four edges.  At the corners, stop stitching 2 or 3 stitches from the corner, turn to 45 degrees, and sew to the next side, then turn and complete sewing the side.
20. Trim seams and
21. Corners
22. Cut a piece of fusible padding slightly smaller than the finished ornament – trim the corners to reduce bulk.
23. Iron in place
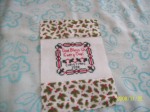
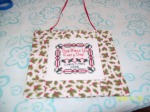
24. Turn the ornament right side out.
25. Cut a length of the stitch witchery to fit the opening (Do you see the price – I don’t have any idea how old this is or when I bought it, but by the price, it was a lo-o-o-ong time ago – lol!)
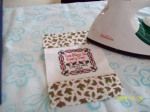
26. Tuck the stitch witchery into place under the folded edge in back.
27. Press to secure.
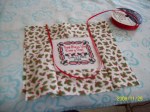
28. Embellish with buttons, jingle bells, charms or whatever you desire! Have fun! And do let me know what you think – I love hearing from you.


Ornament Finishes I
1 Comment
Plastic Frame Ornament
One of the simplest finishes has to be using a plastic ornament frame. These come in all types of finishes, from simple colors to metallic finishes. Some have a clear plastic inlay, but I never use those – there isn’t enough room to put spacers between it and my stitching, and I worry that, over time, the stitching will get damaged. I have purchased lots of them from Ebay – it’s a convenient source all year long. Craft stores generally only carry them during the holiday season.
1. Some frames come with a pre-cut backing piece, if not, cut one (from foam board or acid free cardboard) to fit your frame.
2. Trim your stitching to fit the backing. Use a narrow bead of clue just around the very edge.
3. Place in frame and run a bead of glue around the edge to secure in place (or else you may constantly be replacing it – they tend to pop out!)
4. Ta-Da!
Of course, you can embellish the frame – use glitter, ribbon, lace, sequins, tiny buttons or charms.
And don’t overlook other re-purposed items for frames. I have some ornaments done years ago framed in wooden drapery rings (packed up at the moment, so no pics :-(.
And I like to use canning jar lids for a country look.

What is the most unusual ornament frame you have seen?
